Monday last week my mom, brother and myself went to visit my sister, brother-in-law, and the baby in Jamestown NY. We left around 10:30 in the morning. We stopped off in Iowa City for lunch and then traveled on to our first stop in Granger IN, a little town by South Bend IN. We had dinner at a place called The Tilted Kilt. A loud sports bar. Not the best place to be on a Monday night after a long day of driving.
Tuesday we left around 9 a.m. and started the second leg of our trek. We headed to Erie PA, where my brother-in-law's parents live, to meet them and Monica (my sister) and Rick (my brother-in-law) and Justyn (the foster baby), for dinner. After dinner we drove the rest of the way to Jamestown for the night.
Wednesday morning we headed to Big Boy for breakfast then to Monica's to get her and the baby. We then went and had lunch at Big Boy again. I don't need to go out of my way to eat at one again. We then went to the Roger Tory Peterson Institute. It was very interesting to learn about how he created the field guides for bird watchers. He drew very detailed illustrations of all the birds. He also described how to tell the difference of each bird with in each species with arrows pointing out the subtle differences of each bird. We dropped Monica and Justyn off at home and then went back to the hotel to have a drink before we went out to dinner. We met the three of them for dinner and then said good night for the evening.
Thursday morning we met my sister, brother-in-law, and the baby at the mall. Mom wanted to buy some stuff that they needed for the baby like more sheets and towels some cloths. After that we went back to our hotel had some lunch. Then Mom, Paul, Monica and family went on a driving tour or the area. I stayed behind in the hotel to have a nap cause I had a headache. When they came back it was time to head out to dinner. We had a nice dinner at a Mexican place. After dinner we said our good-byes.
Friday morning we woke up to about 4 inches of wet snow. We headed out after breakfast around 9 a.m. It was pretty cold out but as we drove the snow changed to a rain/snow mix and eventually stopped. On this leg of the trip home we planned to hit about 4 quilt shops. The first place we looked for was called Cottonpickers Quilt Shop in Madison Ohio. Turned out the place was out of business. Found out later, at the next stop, that it moved. Our next stop was in Mentor Ohio at a place called Quilts & Sew Forth. Cute little shop on the ground level of a strip type mall. Spent about an hour there then went to an Italian restraint that the owner of the quilt shop recommended. They had great wedding soup. After lunch we then headed to a place in Bettsville Ohio, called The Door Mouse. It's the biggest quilt shop I have ever seen. It's in a barn on highway 20. We got there about 4:15 in the afternoon. When we first stepped in it was very over whelming. They have an inventory of 14,000 fabrics. There was so much to look at, at first I didn't know where to begin. After looking around some I started to find fabrics to go with the others I had purchased along the way. I also bought a pattern to use all these fabrics in. I'm going to make a memory quilt to remind me of the trip. There was so much to look at in The Door Mouse that we shut the place down. Had a good time.
Saturday we stopped at a few places in Indiana but didn't find anything I HAD to have. We stopped over night in Joliet Illinois and then finish up the trip on Sunday the 14th. It was a very windy day to be driving and we were very happy to get home. The week was fun but tiring. I'd love to go back to The Door Mouse one day. Also take more time to just do a quilt shop hop, I'll just be sure I call them before I go find them to be sure it is still in business.
Saturday, November 19, 2011
Wednesday, November 2, 2011
Another Chenille
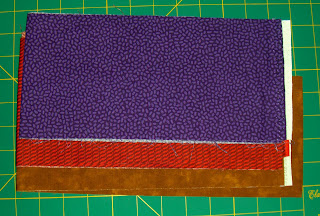
I finally finished the Chenille blanket that I made for my friend. It is the biggest blanket I have worked on to date. I first went to a fabric store with my friend and brother to pick the fabrics. We chose 5 different flannels.
 I layered them as they are pictured here. I sewed down the center both directions so there were 4 quartes to sew the diagonal lines. I used a chalk pencil and a ruler to draw the lines that I would sew.


 The other side.
 Both sides.
The quilt was well received. I was happy to get it done in time to give it to her when we went up to Minneapolis this past weekend. I will now be working on my applique stuff since that doesn't require a sewing machine.

With such a large amount of fabric I would roll it and safety pin it to hold so I could easier feed it through the machine.
Part way through the sewing process I got my new sewing machine.

Then after another week I had to move my sewing machine up to my room since we are going to be having some work done in the basement. The sewing machine is sitting on my desk till the work is completed. So I had to improvise a table to let the blanket to rest on so the weight wasn't dragging it off the desk all the time.

It took a few weeks to sew all the lines. After all the lines were sewn I then took a scissors and cut 2 of the layers on each side so the black fabric would show through. Then sewed the binding, washed and dried it and ended up with the finished blanket.

This is one side.


The quilt was well received. I was happy to get it done in time to give it to her when we went up to Minneapolis this past weekend. I will now be working on my applique stuff since that doesn't require a sewing machine.
Sunday, October 16, 2011
8 year old baby chenille
I went to QC's mini retreat that they have once a month. I thought it would be a good opportunity to work on the 2 chenille blankets I have been working on these past few weeks. Ok, well one I have had around for 8 years. I started a chenille blanket for a friend when she was pregnant with her first child. I don't remember the reason I didn't finish it in time but it sat in the basement along with all the other projects I started and haven't finished yet for 8 years. Needless to say, he is now too old for the quilt. I do have someone I decided I wanted to have it, however. So I took it and this other blanket to work on to QC. I didn't have much left to do, just needed to sew on the binding. Not having done that for 8+ years QC's mini retreat was the place to go and get help. Binding is just as difficult as I remember it. With some trials and tribulations I did manage to bind the quilt.
 I chose 4 fabrics. The 3 layers that are cut through are a blue, yellow, and green with a small plaid design. The back fabric is stuffed animals (bears, elephants, cats, and more) all in pastel colors.
 Since the back fabric is a printed design and is white on the reverse side, I added another layer of that to the white side so that the animals showed through after the lines were cut. I then used the same fabric as the back fabric for the binding.
 One of the things I like about my new machine is the quantity of stitches from which to choose, many of them are really cute designs and a few alphabet styles also. I wanted to use a really cute heart stitch and put my name and date in there someplace. Unfortunately, after some trials it worked out not to use that one. Turned out there were just too many fabric layers to make that design look good, so I went with a nice zigzag. I also used a nice variegated purple thread, which looks really nice.
 I am really glad I have finally finish something after all these years. I am really glad I got this finished. I do enjoy making the chenille blankets because they are pretty simple, just time consuming. I'm just not a fan of binding. I know that as I do more of them I'll get better at it.
I have one more chenille posting to make but it's late now and I don't want to use up all my material in one night. Good night, happy quilting dreams.


I have one more chenille posting to make but it's late now and I don't want to use up all my material in one night. Good night, happy quilting dreams.
Out with the old, in with the new.
Last month I decided I wanted to get a new sewing machine. I knew I wasn't going to be able to afford one right away but I decided to go to QC and see what they cost and figure out how long it would take me to save. As luck would have it they were having a sale on a sewing machine. I still wasn't going to be able to afford it that day but, much to my delight, they do lay away. I went home and discussed it with Mom (told her my plan) and the next day I went and made my first payment. A week later I went to make the second payment and discovered I had a little help from some very generous people I know and was able to take it home that day. Here are pictures of the old and new machine.
 This is my old machine. It's some brand I have no idea what it is. I got it at an over stock sale at Hobby Lobby 11 years ago.
 This is my new machine. It's a Viking sapphire 835. It's really slick. Everything is automatic and has a lot more stitch options to choose from. It also has a bigger base space. I can fit the chenille blanket I am working on in there a lot easier than the other one. I am going to miss the smiley face sticker I put on the other one though.


Wednesday, October 5, 2011
Chenille Part 2
This is actually Part 1 for my chenille history. I made my first chenille quilt for my dad when he was ill and recovering from surgery. He was always cold, and I could and can relate to that. So when I saw a chenille baby quilt at QC I thought it looked pretty easy and really cozy. I bought the pattern and enough flannel to make a 36" x 45" with 4 layers. I took it all home and layed it out on the floor in the basement. I pinned it all together with safety pins to try and prevent too much shifting. Never having done one before I had no idea I had to get a thing called a walking foot for my machine. Imagine trying to stuff four layers of fabric through the machine, it wasn't pretty. Next day feeling frustrated I went back to QC to see what I was doing wrong. "You need a walking foot" I was told. What is a walking foot? I don't remember how it was explained but I went to a sewing machine shop in town to buy one. Got my foot and went home to install it on my machine. Took me about 30 minutes to figure that out, but I got it and started on the blanket. Now I know I'm making it sound like I knew what I was doing, but I didn't. I took many trips with my machine and blanket to QC on Friday nights when we could go in and get help with our projects. I eventually got it all sewed. Next came the part where you cut between the sewed lines. For four layers you cut through three of them all the lines. That took a long time and my hand would get very tired. I had to take many breaks to give my hand a rest. After all the lines are cut I then sewed the binding on. Again, not knowing what to do I took it, my machine, and the material I used for the binding, went to QC yet again and got help with that. In the end I think the quilt turned out pretty good. Dad liked it a lot and used it all the time.
Here are a few pictures of Dad's blanket.
This is the front. You'll see that I did 3 lines running down the center both directions.
 I discoverd later that this was not a good idea. After washing it, you'll see it all frays out to get that nice soft fluffy look. The vertical and horizontal lines however are coming apart. The threads were cut with the grain of the fabric and the threads are coming out. I chalk that up to a lesson learned.
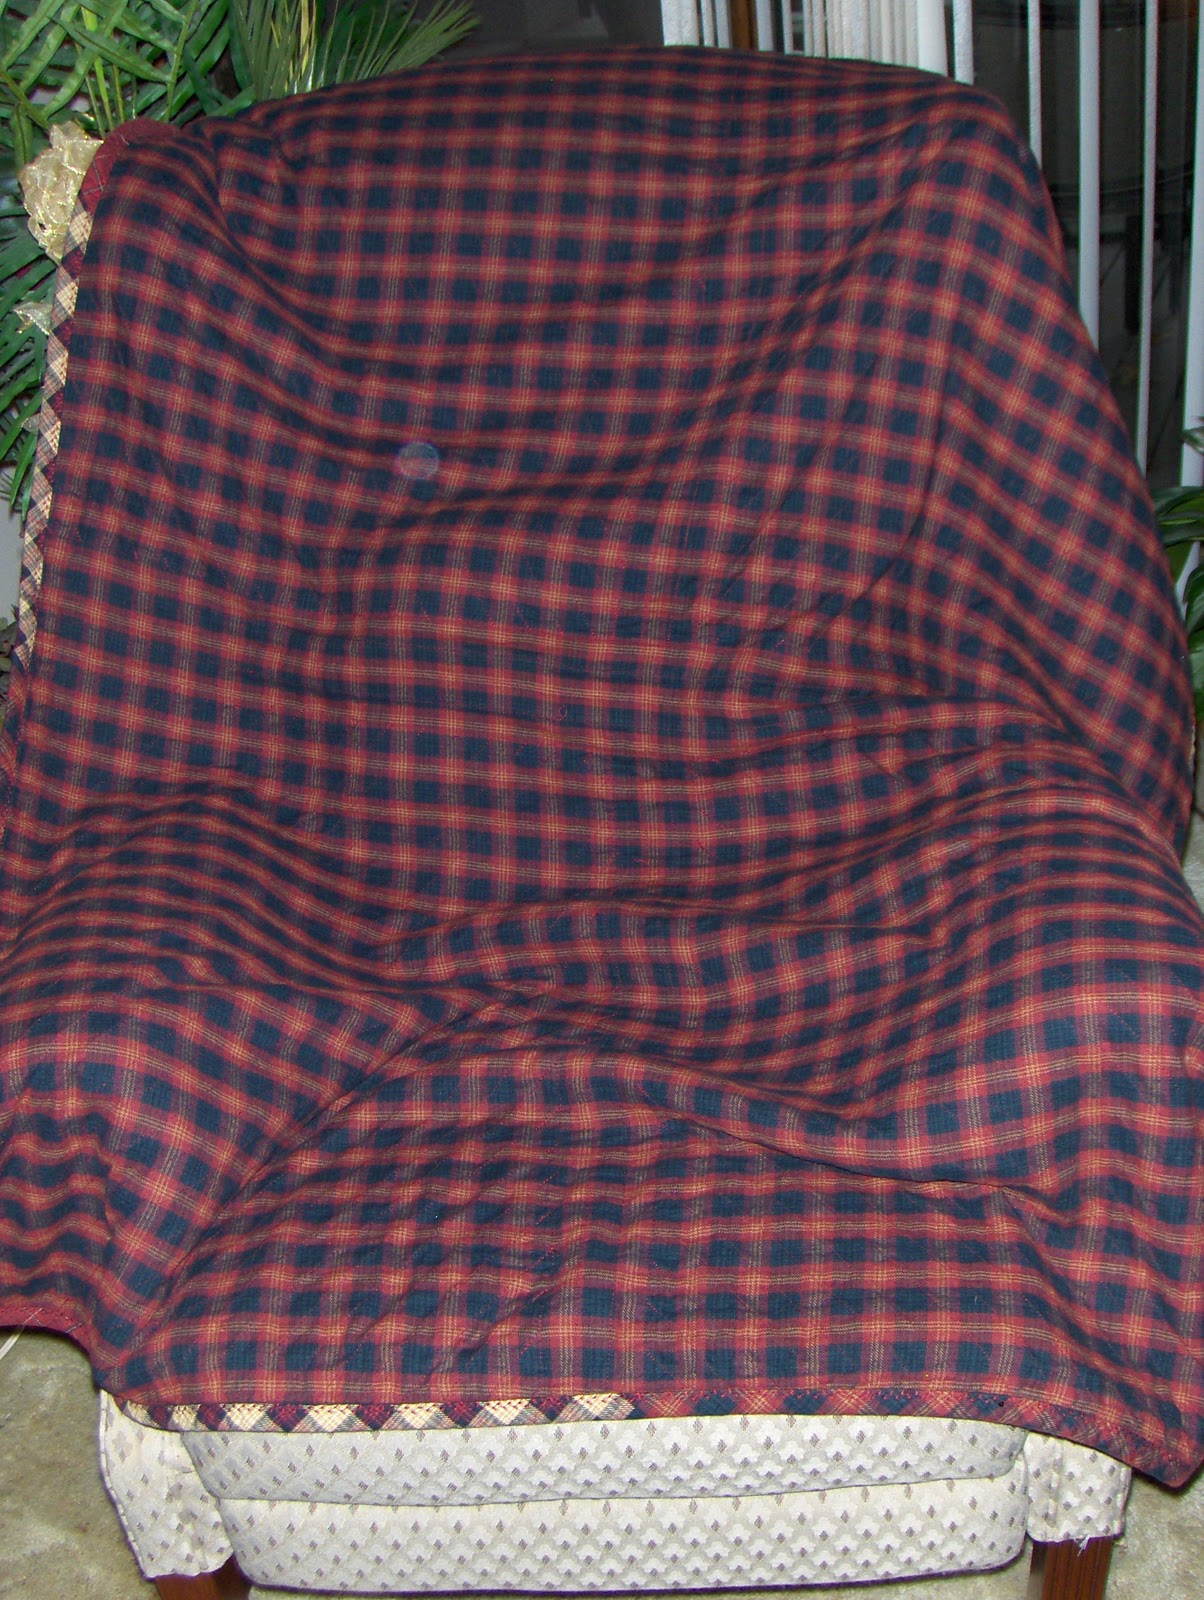
This next picture is the back layer. I chose several nice bergandy and black plads. It's very manly looking.
 I really like making these kinds of quilts. Believe it or not they are really easy -- just very time consuming.
A couple more photos of Dad's blanket.


Tune in next time when I post photos of the one I made for mom. It is totally different.
Here are a few pictures of Dad's blanket.
This is the front. You'll see that I did 3 lines running down the center both directions.

This next picture is the back layer. I chose several nice bergandy and black plads. It's very manly looking.
A couple more photos of Dad's blanket.


Tune in next time when I post photos of the one I made for mom. It is totally different.
Sunday, September 18, 2011
Chenille Blanket Part 1
I know I have been a bit remiss in my postings, but I have been busy working on a chenille quilt for a friend. Which brings me to this post. I made 3 chenille quilts in my early years of quilting. I made one for my Dad, one for my Mom, and one for my Brother. I still need to take pictures of the ones I made mom and dad, but I have pictures of the one I made my brother.
 Now as you can see it has 2 color schemes. One is lighter than the other. The blanket has 4 layers of fabric sewn together with 3/4" lines. After sewing the lines I cut between the sewn parts through all but 1 layer of fabric. Typically this is done on one side and the bottom layer is left uncut. In this case, I cut between every other line. On the other side I cut between the lines that were not cut, thus giving the 2 tone effect.

I then cut the blanket to make the edges even. I also cut the corners so they were rounded. Then I cut the binding into 2" strips and sewed them together giving me a nice long piece to sew all around the edge. This blanket was the third one I made.

I really enjoy making these blankets. They are pretty easy but time consuming. I will take pictures of the other 2 and the one I am working on as I get the time to take them.
Sew well and sew lots.
Tuesday, August 30, 2011
What I do in my spare time.
I like quilting. I have a few projects going at the same time. The World of Blossoms quilt, the Dachshunds, and now a chenille quilt for a friend. I'll blog more about that later.
I like to read a lot, as well. I read a wide variety of genres. James Patterson http://www.jamespatterson.com/ is one of my favorites. But another author I like to read is Jennifer Chiaverini http://www.elmcreek.net/. Her books are a tiny part of what got me started quilting. I don't recall how I started reading her stuff but sometimes when I'm in the bookstore looking for a new book I will look in sections that I typically go to. I wandered into the fiction section because that is where I have found books that have been surprisingly good. As I look at books a lot of the time a cover is what makes me pick it up. Her first book, The Quilter's Apprentice http://elmcreek.net/books/the-quilters-apprentice, caught my eye. The cover was not the same as this one but just as pretty. As I read the book, I thought it would be wonderful to be able to make something that beautiful. I did some checking to see if there was anyplace near to where I live where I could take lessons. Lucky me, there was the Quilting Connection http://iaquilts.com/. I took my first lesson in beginning quilting. It was such fun. I never got that one finished. It still needs to be quilted and have the binding put on. I'm actually not sure I have enough fabric for the back and I doubt I'll find it again.
But I digress. I had stopped quilting after about 2 years. I started quilting again at the begining of this year because I needed something to do with the large quantities of time I had on my hands. I had started reading the Elm Creek Quilts series again and decided I would quilt again. After all I needed to do something with all that fabric I have in the basement.
So besides books about the Elm Creek Quilters there are also several books with the patterns that are talked about in the books. I have the first one http://elmcreek.net/books/elm-creek-quilts. I have not done anything from it because I know my skill would not do these justice. Maybe one day.
Well that is a bit about what other hobbies I have. Hope you like try some of these books and enjoy them as much as I do. I know my mother does and she doesn't even quilt. I like them so much I even preordered the next 2 for my Kindle. One day I'll get them all on the ereader.
Have a good night.
Tuesday, August 23, 2011
Dog gone it!!!!

I spent about 4 hours there sewing the little guy on. Didn't get it finished then but spent time off and on doing it over Saturday and Sunday. I then sewed on the collar.

After I got that cut out and sewed on, I moved on to the ear.

I then moved on to the flower. I did not like sewing on the flower. All those curves make me nervous.

I thought it turned out pretty good but felt it needed something more. I went to Joanne Fabrics and bought a package of brightly colored buttons that are about the size of a small pea. Was gonna sew one in the center of the flower on it's butt.

Then my mother pointed out to me that I sewed everything on to the wrong side of the fabric. Not sure if it would bother many people, but it really bugs me. My mom said 'Oh don't worry about it, no one will notice.' I notice, if it wasn't intended as a gift, it probably wouldn't bother me so much.

Monday, August 15, 2011
Too cute for words.
I saw this pattern in an e-mail I get from http://www.clotilde.com/. I thought it was so cute and I know exactly who I'm gonna do it for. I'm not going to make an actual blanket but I thought a couple of cute pillows for the couch would be cute.


The following are some of the fabrics I chose for this cute little fellow.


I'll get these done, hopefully by christmas.

I also laminated this pattern cause it is a definite keeper.

This is one background fabric and fabric for the dog shape.

The lighter fabric is for the background and the others for dog body shape.

And these three are for the ear, collar, and flower on the butt.

World of Blossoms color scheam
As I promised, I took pictures of my color scheme. I didn't get the other blocks traced onto the pattern ease today because I just didn't feel like it.
This fabric I chose for my background block fabric. 
These are the colors I chose for the flowers. I think I'm going to get another purple or two. I like to switch it up in my colors. Honestly I can never make up my mind on what colors I want. I just need to get busy cause when I get something sewed on, I'm not going to take it out and start over.


And these are the colors I chose for the leaves and stems and center of the flowers.

The next class is next Monday. I'm going to try and at least get leaves and stems sewed onto a background. I have 6 days to get this accomplished. Good luck me.
http://mandmplus3.blogspot.com/ This is the link to my friend Mandy's blog. She took pictures of some of the other ladies blocks and posted them here. I told her that, since she is not able to come these next 6 months, I would take pictures and email them to her. Now I just need to be sure my camera is charged up and remember to take it with me.
Sunday, August 14, 2011
What I did today.
Ok, so I said I was going to start working on my projects and I did. The quilt project is a doozie. It has 20 finished blocks and the finished quilt is 88" x 106 1/2". I believe that is a queen sized quilt. Now I don't have a queen sized-bed so I'm going to make mine 3 blocks by 4 blocks. The finished (if it ever gets there) may be a bit bigger than a twin size, but I'd rather have extra then not enough.


These are the blocks for the quilt. I have not decided which ones I'm going to use yet, but I do know there are several I won't use.
So back to working on the project. I guess you can say that I technically started in earnest last week. I took the patterns for the blocks we have been assigned so far to Copyworks, and had them laminated.

I did this hoping to keep them in good shape should I chose to do it again. HA yeah right. I do think I'll make a couple of pillows from a few of the ones I don't include in the blanket.
Ok, so today I organized the patterns and pulled out, from the laminated ones, the ones I hadn't traced onto the pattern ease. I then cut my pattern ease to the 14 x14 inch block the instructions called for. I then ironed it so it didn't have all the folds in it from being in the shopping bag for the last 2 months. I then taped the pattern to my cutting mat and taped the pattern ease over the top of that. I use a medium shade of blue to trace with. It took me about 3 hours to do all this. Yes, I am slow, but I wanted to take my time and do it niceish. I was also watching a movie so I was a bit distracted.
Tomorrow I will finish tracing the patterns on the pattern ease and then cut out the background blocks. If I'm in the mood then I'll go down to the sewing machine and sew the edges of the blocks so they don't fray and sew the pattern ease on to the background block.
I probably won't blog about my project every day. I know you all will miss not having something so spellbinding to read every day, but there may be days where I just didn't have time to do anything, and I'm sure you don't want to hear about what I had for dinner.
Tomorrow, however, I will take pictures of my color scheme to show you. I know you can't wait for that.
Till tomorrow, have a good night.
Pippa
Saturday, August 13, 2011
This is my first blog ever.
I have been curious for awhile about blogging. I've been afraid to try and also figured I didn't have anything interesting to write about.
I met Mandy at a quilt class at The Quilting Connection in Ames Iowa. We were taking a hand applique class, taught by Angela Lawrence. The class was 6 months and ended in July. There is another 6 months starting here in August that unfortunately Mandy will not be able to attend, but I will be.
Now, I am not much of a quilter. I made a couple quilts about 10 years ago for my nephews, who are now 18 and 16. I also made 3 chenille quilts for my mother, father and one of my brothers. I stopped quilting shortly after that cause it became too difficult to go up and down the stairs to get to the sewing machine.
I started quilting again earlier this year mostly out of boredom. I was trying to think of a way I could quilt and not have to go down to the sewing machine that much. I went to the local quilt shop, Quilting Connection, and talked to the nice ladies that still run the place. I wanted to try doing it all by hand but no one really knows how to do the piecing by hand. As we talked, we came up with the idea of hand applique. At least that way I can do part of it by hand and then trudge to the basement as I wanted to do the rest.
I was excited by this prospect and signed up for the class. Now I will admit that I am a terrible procrastinator. We have done the first 6 months of the class and 10 blocks. I have yet to get 1 finished. That is why I decided to blog. I thought if I blogged about my progress I would probably do a better job of having something to show. Mandy's blog inspired me to do one of my own.
I will take photos of my work so you can all see my progress.
Thank you for reading my little blog.
Pippa
(Yes, Pippa is my real name. I had it before Princess Catherine's sister did.)
My profile photo is a heartland stars block I did for a class that I unfortunately didn't finish. I decided 2 quilt classes was a bit more than I could handle since I hadn't quilted in 10 plus years.
Subscribe to:
Posts (Atom)